|
|
|
Use our in-depth search tool to find delicious recipes that fit your needs.
Commissary
patrons encouraged to share their
favorite recipes By
Kay Blakely,
DeCA
home economist
For
example, have you ever made Sweet Potato Balls? Its a mixture
of cooked sweet potato with butter and brown sugar folded in,
heaping spoonfuls of which are formed around a full-size
marshmallow, then rolled in coarsely crumbled corn flakes and
baked in a hot oven just until the exterior is nice and crisp.
How about Cheesy Potatoes cooked cubed potatoes set to swim
in a smooth Velveeta cheese sauce, then topped with crumbled
cheese crackers and baked until golden? If
youre a big fan of the green bean casserole topped with
French fried onions, you might enjoy a similar dish made with
frozen cauliflower, carrots, and broccoli bathed in a mushroom
soup and sour cream sauce, then topped with cheddar cheese and
French fried onions. Finally, cranberry sauce from a can will
do, if you just cant do any better, but Ill bet youd
love a jellied cranberry salad that uses a can of whole
cranberry sauce, some chopped celery and walnuts, a package of
gelatin, and thats it. Its quick and easy, and the result
is to-die-for good! Actually,
all these recipes fall into that same category of easy, but
just cant beat it delicious! They all came from
Defense Commissary Agency patrons and will be posted in Kays
Kitchen on DeCAs Web site at www.commissaries.com.
When Thanksgiving rolls around, no one will be short of good
recipes to serve thanks to these contributions! Recipes
for the Web site are still being accepted. Send them in the same
format found on the site recipe name, ingredients list, and
directions listed numerically. Make sure they are clear,
complete, and written in easily understandable terms. Send your
recipes to: kay.blakley@deca.mil.
To
start the ball rolling here is a must have recipe for my house
for Five-Cup Salad. Make some up and dont forget to share
your Thanksgiving recipes with all of us. Five-Cup
Salad 1
cup pineapple chunks, drained 1
cup mandarin oranges, drained 1
cup flaked coconut 1
cup miniature marshmallows 1
cup sour cream 1
cup chopped pecans (optional) 1.
Drain fruits well. 2.
Mix all ingredients together. Cover and chill several hours or overnight and serve. Culinary School CookStreet.com offers a wide variety of culinary courses for everyone from the aspiring professional chef, to the backyard grill master. Eating
healthy as a family on the go
With a little planning, preparation and commitment, todays
busy families can enjoy healthy meals and snacks whether on the
run or sitting down together. At the same time, teens can learn
the value of the commissary benefit and the 30-percent savings
that can stretch any grocery budget. Make a meal plan for a week
and put it on the refrigerator. Have each person in the family
sign up for something, to include planning the meals and snacks,
buying the food, fixing the food and cleaning up. As part of
your plan, consider the following tips: ·
● Keep a list of favorite foods and meals on the
refrigerator to help in planning meals and snacks. ·
● Make the meal plan serve as a shopping list and weekly
menu. Include your children when shopping at the commissary for
the foods on the meal plan. ·
● Teach children about budgeting money for food. They can
learn to plan the menu around your budget. ·
● Commit to eating together as schedules allow. Aim for at
least one night a week. For
more information on family meals or other nutrition topics, go
to www.commissaries.com
and visit the DeCA Dietitian forum. You can post your questions
there or access other helpful information in The Dietitians
Voice archive.
A nibble of dark chocolate a day may keep blood pressure at bay By
DeCA Home Economist Kay Blakley
Eating a small piece of dark chocolate with less than 30
calories seems to lower blood pressure, according to a recent
study published in the Journal of the American Medical
Association. Dark chocolate contains flavonoids and
antioxidants, which relax blood vessels and protect against free
radicals that contribute to heart disease. Look for dark
chocolate with at least 70 percent cocoa content. Identify the
type of fat used to make the dark chocolate and choose one that
is made with cocoa butter, which has a neutral effect on cho For a
scrumptious grill, throw some shrimp on the barbie By
DeCA Home Economist Kay Blakley
This practice applies to all retailers who sell fish, not just
to commissaries. About the only way you can truly buy it fresh
is if you meet the shrimp boat as it pulls into the dock. Shrimp
is such a popular item it has become an international commodity,
and much of what we eat in
So what kind of quality indicators do you look for, if it comes
from everywhere? Avoid
shrimp with black spots on their shells, which may be a sign of
spoilage. The exception to this rule is a species called black
tiger shrimp, a commonly sold shrimp which has a distinctive
gray shell with black, red, or yellow feelers. Also, avoid
shrimp with dry spots, which may be an indicator of freezer
burn.
Shrimp freezes beautifully, but once thawed, it is highly
perishable. If you purchase it frozen, keep it frozen until the
day before you plan to cook it. Thaw in the refrigerator, or
under cold running water. If purchased thawed or fresh, keep it
as cold as possible and plan to cook it the following day.
Whats the best cooking method for shrimp? Any method you
choose. It can be baked, broiled, steamed, breaded and fried, or
boiled with excellent results. But, one of the quickest and
easiest methods is on the grill. All it takes is a fast four
minutes on the fire and youre ready to enjoy. Follow the
steps in this easy but delicious recipe, if its your first
time grilling shrimp. Once you experience how easy it is, youll
have the confidence to branch out in whatever direction tickles
your taste buds. Check
out your commissarys shrimp selection. Then savor the savings
30 percent or more as much as you savor the flavor, once
youve thrown those shrimp on the barbie. For
more Kays Kitchen recipes, visit DeCA on the Web at www.commissaries.com. Grilled
Shrimp with Fresh Herb Sauce (serves 4) 2
pounds large or extra large shrimp, peeled and deveined 2
tablespoons extra-virgin olive oil ½
cup fresh lemon juice 1/3
cup extra-virgin olive oil 1
tablespoon minced garlic ¼
to ½ teaspoon hot pepper sauce, or to taste ½
cup coarsely chopped fresh herbs (any combination of parsley,
sage, thyme, basil, marjoram, oregano,
etc.) Salt
and freshly ground black pepper to taste 2.
Combine all the sauce ingredients together in a large serving
bowl, and set aside. 3.
Place the shrimp in a separate bowl, drizzle with 2 tablespoons
olive oil and toss to coat well. 4.
Place the shrimp on the grill -- thread shrimp on skewers, if
desired, or just place it on the grate carefully, so it doesnt
fall through. Cook about 2 minutes on each side. Turn the shrimp
after the first side becomes pink, and repeat the process for
the second side. Remove
shrimp from the grill, add it to the sauce mixture, toss gently,
and serve immediately. An asparagus bouquet By
DeCA Home Economist Kay Blakley
If mom is watching her figure, a generous five-spear serving of
asparagus will only cost her about 25 calories. If shes of
child-bearing age or perhaps pregnant right now, shell get a
super dose of folic acid, a B vitamin important for prevention
of birth defects, and a significant amount of the antioxidant
glutathione, which is linked to cancer prevention. Asparagus is
also a good source for vitamin C, thiamin, and vitamin B6.
Does mom ever get a case of puffy ankles or swollen feet? Well,
bring out the asparagus! It acts as a natural diuretic,
efficiently flushing the excess fluid from those uncomfortably
enlarged tissues. Once the diuretic effect kicks in, dont be
alarmed if the urine takes on an usual odor. Asparagus contains
a sulfur compound (also present in onions and garlic) that
releases this scent once it is broken down in the digestive
tract. Not everybody has this experience apparently
your genetic makeup determines whether or not your body can
break down the substance. At any rate, its nothing to worry
about.
Asparagus is one of the first fresh vegetables to come into
season the minute spring arrives. If youre stationed in
If you happen to be stationed in
Whether white or green, choose the freshest looking spears you
can find ones with smooth, tender skin, compact, tightly
closed, pointed tips, and cut ends that are not overly dry.
Choose thick or thin spears depending on how you plan to cook
them. Thin asparagus (no bigger than the size of your little
finger) are best steamed, boiled, sautéed, stir-fried, or
microwaved, while thicker spears are better suited for roasting
or grilling.
Once purchased, get the asparagus home and refrigerated as soon
as possible, as spear toughening occurs rapidly at room
temperature. To keep the spears crisp and fresh, store them
standing upright in a cup, a plastic glass or similar container.
Add about an inch of water to the bottom of the container, and
cover the spears, from the tips down, with an unsealed plastic
bag. If this is not possible, wrap the cut ends with a damp
paper towel and store in a closed plastic bag. For best results,
try to use the asparagus on the day of purchase or the next day.
If the asparagus is very fresh when purchased and carefully
stored it may keep for three to five days in the refrigerator.
But then again, it may not, so using it quickly is always best.
When youre ready to cook, rinse the asparagus well with cold
water, then snap off the tough cut ends in the following manner.
Use one hand to grasp a spear at the base (cut end) and hold it
upright, gently bend the spear with the other hand placed a
couple of inches higher up the stalk toward the tip. The spear
will snap at the point where it begins to toughen, usually about
an inch, or so, from the cut end. If the spear above the break
appears to be very fibrous, use a vegetable peeler to remove the
skin up to, but stopping before, the tip.
To Boil: Use a skillet, wide enough to accommodate the asparagus
spears in a single layer, and deep enough to cover them with
water. Bring the water to a boil (add a teaspoon or two of salt
to the water, if desired.) Once the water is boiling rapidly,
gently add the asparagus, and bring quickly to a second boil.
The cooking time required will vary from about 5 minutes for
thin spears to 10 minutes for thick spears. Watch the pot
carefully, and the minute a spear turns bright green, you will
know it is tender-crisp, and just about perfect. Use a slotted
spoon or tongs to remove spears to a plate as they reach this
state of doneness. Be sure to drain any accumulated water from
the plate before serving.
To Microwave: Place one pound thin to medium trimmed spears in a
2-quart baking dish. Add 2 tablespoons lightly salted water.
Cover and cook on high until tender-crisp, 4 to 9 minutes,
rearranging spears (moving those in the center to the outside,
and those on the outside toward the center) every 3 minutes. Let
stand, covered, for 2 minutes.
To Grill: Use paper towels to pat the rinsed and trimmed spears
completely dry, then generously brush with oil. Place the spears
crosswise on the grill grate, so they dont fall through, over
a slow wood or charcoal fire. Turn the spears frequently until
you can smell the asparagus and one tastes cooked through.
Cooked asparagus can be served hot or at room temperature, and
can be enjoyed just as it is, which is the lowest calorie
option, drizzled with melted butter, seasoned oil or basic
vinaigrette dressing, or topped with classic Hollandaise Sauce,
either made from scratch or from one of the packaged mixes your
commissary carries.
Make asparagus part of your Mothers Day meal, and chances
are, youll be re-creating that part of the celebration again
and again throughout the year. Enjoy! Happy Mothers Day, and
Ill see you at the commissary! Beef
rouladen brings a taste of Germany to
your kitchen table By
DeCA Home Economist Kay Blakley
According
to Franke, a lifelong resident of
If you shop one of the European commissaries, you will
find a cut specifically labeled top-round for rouladen in
the fresh meat case. If youre located elsewhere, but your
commissary has an in-store butcher, ask for scallops of top
round cut one-quarter-inch thick. Chances are fairly good the
butcher will know exactly what you need. Especially when you
tell him you are making rouladen. Dont bother trying this at
a retail grocer outside the gate. Unless you happen to live in
an area heavily populated with German-Americans, they will have
no clue what youre talking about. They dont have the
international flair and well-traveled clientele that we have.
Just one more reason that shopping the commissary is always
worth the trip!
Serve beef rouladen with braised red cabbage and spätzle or
creamy mashed potatoes. For
the beef rolls 1
½ to 2 pounds Top Round for Rouladen two packages
containing 3 scallops each makes about 12 rolls 2
tablespoons German mustard ( ½
cup finely chopped onion ½
cup finely chopped dill pickle (choose a firm dill thats not
too sour or too salty) 2
slices bacon, diced 2
tablespoons minced fresh parsley 1
tablespoon butter 1
tablespoon vegetable oil For
the sauce 2
cups canned, low sodium beef broth ½
medium onion, coarsely chopped 1
large rib celery, thinly sliced 1
carrot, coarsely chopped 1
leek (white part only) halved lengthwise and thinly sliced 1
medium potato, peeled and coarsely diced ¼
cup tomato paste ¼
cup half-and-half ¼
cup evaporated skim milk Salt
and freshly ground black pepper
Heat up the Day with Memphis Barbecue spareribs By Kay Blakley, DECA FORT LEE, Va. A backyard cookout for a family gathering is about as American as you can get and a great way to beat the summertime blues. If youre searching for something a little snazzier than humdrum burgers and dogs, youre in the right place. Why not try preparing succulent, seasoned-to-perfection, fall-off-the-bone-tender barbecued ribs? Priced-right ingredients from your commissary, along with some how-to tips from yours truly, and a trust worthy recipe are sure to earn you the title of Pit Master Extraordinaire even if youve never grilled ribs before! The Memphis Barbecue recipe calls for spareribs, which are from the side or underbelly of the pig. To avoid having to trim the rack at home, look for spareribs called St. Louis style, which means the brisket bone and breast meat have been trimmed off to produce a narrower, more rectangular rack. Spareribs have a marvelous meaty flavor and, since they are not as lean as the more popular baby back ribs, they do very well on the grill. Baby backs, cut from the loin section or the back of the pig, will also work fine in this recipe. They are smaller, easier to eat, and very tender, but because they are leaner, they can dry out easily during a long slow cook. If you choose to use baby backs, be sure to mop them generously, and check for doneness after two and a half to three hours. By the way, if you normally think of mop only in terms of something done to a dirty floor, just keep reading. In this case, mop refers to a kind of basting, done with a cooking tool resembling a rag mop. All will be clarified as you read through the recipe I promise. Plan on about one pound per person for either type of ribs. Dont be put off by the length of the recipe. Even though it might look complicated at first glance, believe me, there is nothing difficult about it. All it requires is a five-minute stretch of your full attention, at the appointed time, over a span of three to four hours. Let your guests bring all the side dishes and spend that time visiting and working up an appetite from the scrumptious aroma youll be creating in your own backyard. Memphis Barbecue Spareribs (serves four to six) These ribs are moderately spicy adjust the cayenne and Tabasco, as you wish. To reheat leftovers, place ribs in an ovenproof dish, add a few tablespoons water, cover with foil, and place in a 250-degree oven for 20 to 30 minutes. Ribs 2 full racks St. Louis cut, pork spareribs, 2 ½ to 3 pounds each, trimmed of excess large pieces of fat, membrane removed, and patted dry. Spice Rub 4 tablespoons paprika 3 tablespoons light brown sugar 2 tablespoons chili powder 2 tablespoons black pepper 1 tablespoon salt 2 teaspoons garlic powder 2 teaspoons onion powder ½ teaspoon cayenne pepper Cider Mop 3 cups apple cider 1 cup cider vinegar 2 cups wood chips, hickory or mesquite Good quality charcoal Tabasco sauce About an hour before cooking time, mix the spice rub ingredients together in a small bowl; stir cider and vinegar together in a small saucepan and set aside. Place wood chips in a bowl with enough water to cover, and set aside. To ready the ribs for the grill, trim away any large pieces of fat; turn the racks rib-side-up and remove the thin membrane lining that sits atop the ribs. Starting at one end of the rack, loosen the edge of the membrane with the tip of a paring knife, or the slender tip of a spoon handle. Using a folded paper towel to increase your grip, grab the membrane and slowly pull toward the opposite end of the rack. It should come off in one piece. Once you see the membrane and feel how very tough it is, youll understand how important this step is to ensuring tender and easily edible ribs. Reserve 2 tablespoons plus 1 teaspoon spice rub for later use, then using your fingers, work remaining rub into both sides of rib racks. Use the entire amount of spice mixture, rubbing it in firmly and packing it on generously. Let ribs stand at room temperature until ready to cook. Light about 45 charcoal briquettes, using the smallest amount of lighter fluid possible to get the fire started. You dont want your ribs to have a faint taste of lighter fluid! When coals are covered with thin layer of gray ash, about 20 minutes, stack them two to three briquettes deep on one side of the grill. Set cooking grate in place, open top and bottom vents halfway, cover grill and heat for five minutes. Remove cover and scrape cooking grate clean with a wire brush; drain wood chips; position ribs on cool side of the cooking grate, as far away from the coals as possible. Drop ¼ cup wood chips through the grate onto the coals; cover grill, positioning lid so that vents are opposite coals to draw smoke through the grill and over the ribs. Bring the mop mixture to a simmer, on the stove; cover and keep warm. Every 30 minutes: Add ½ cup wood chips to the coals, and turn the racks, switching their position from closest to the fire to furthest from the fire, and rotating them 180 degrees. Every hour: Add 12 unlit briquettes to the fire, sliding the top and bottom vents completely open after the first addition. Mopping: After the first hour, baste the ribs (when turning them) with the warm mop. Use a pastry brush to apply the mop if you dont have a barbecue mop. Ribs are done when the meat starts to recede from the tips of the bones and has a rosy glow on the exterior, three to four hours. Before removing ribs from the grill, sprinkle each rack with 1 tablespoon reserved spice rub. One at a time, place each rack of ribs on grate directly over the coals, cooking about 30 seconds on each side, then transfer to cutting board. If youre confident they are tender, tent the ribs with aluminum foil and let them rest for 20 to 30 minutes. To be absolutely certain they are tender; seal them tightly in foil for a 30-minute rest. While ribs rest, add remaining 1 teaspoon spice rub to remaining mop and simmer, uncovered, until liquid is reduced to about 2 cups. Add Tabasco and more salt and pepper, if desired. Slice ribs between bones and serve with sauce on the side.
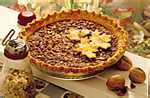
Appetizers & Drinks
Desserts
|
Military
Recipes
The four steps to food safety: Clean, separate, cook and chill to protect foods from harmful bacteria, which can ultimately result in foodborne illness. Military food safety inspectors help to make sure foods offered for sale by your commissary are handled and stored according to strict food safety guidelines. Recipes Recipes
from the USS Buffalo
Nutritional Cooking Carrotjuice.com is the most comprehensive carrot juice resource available online. Browse the website for the latest carrot juice recipes, nutritional and dietary facts Healthy
Ideas Featured Military Food Section Best
Food Sites of the Web
|
Cooking Resources
Cooking
Light Good
Cooking
Baking
Tips Cookbooks
Online Recipe Database Vegetarian
Pages Grilling
Guide
|
|
|
New! Add your favorite Recipe Now! Each entry wins prizes!
|
Commissary shopping
helps combat rising beef prices By Bonnie Powell Beef
prices are hitting record highs right now, said Jack
Fowler, meat operations manager for the Defense Commissary
Agency. Commissary shoppers are going to see an increase in
beef prices as well, but its important to realize that
compared to commercial grocery stores they will still be
saving an average of 35 percent or more on meat. Americans
consume a lot of beef and so do military families. Beef sales
in commissaries are up 5 percent since 2002. But whether
its the popularity of those high protein diets, periodic
bans on imported beef due to mad cow disease scares, or
a drought in the Western United States, the bottom line is the
highest beef prices in nearly a decade are here to stay
for at least the next six months. The beef market is based
on supply and demand, and when the demand is more than supply,
you can expect higher prices, said Fowler. Fowler
suggests families on a tight budget might want to purchase
less expensive cuts of beef until the market supply
stabilizes. Instead of a boneless rib eye steak, customers
might want to try chuck eye steak; instead of beef tenderloin,
shoppers might select a top blade steak; and rather than a
sirloin tip roast, try a shoulder pot roast. Shoppers
just have to look more carefully at the price per pound they
are paying and remember that less tender cuts of meat may
require a change in their normal cooking habits, said
Fowler. For more information on beef cuts and how to cook
them, check out http://www.beef.org. Commissary
beef sales may still be up, but shoppers are also buying more
chicken. Chicken is less expensive and the prices have
remained more stable than beef, according to Fowler. Pork has
also risen in price recently, but the increases are still less
dramatic than for beef. No one knows when the beef price increases will top out, said Fowler. But we do want to remind customers that commissaries offer the best possible quality and price on meat, and that they will get the greatest savings possible by taking advantage of their commissary benefit. -
DeCA - The Defense Commissary Agency operates a worldwide chain of
nearly 280 commissaries providing groceries to military
personnel, retirees and their families in a safe and secure
shopping environment. Authorized patrons purchase items at
cost plus a 5-percent surcharge, which covers the costs of
building new commissaries and modernizing existing ones.
Shoppers save an average of more than 30 percent on their
purchases compared to commercial prices savings worth more
than $2,400 annually for a family of four. A core military
family support element, and a valued part of military pay and
benefits, commissaries contribute to family readiness, enhance
the quality of life for Americas military and their
families, and help recruit and retain the best and brightest
men and women to serve their country.
|
|
|
© Partnership Marketing Inc. No Endorsement Implied |
|||||||||||||||||||||||||||||||||||||||||||||||||||||||||||||||||||||||||
|
|
||||||||||||||||||||||||||||||||||||||||||||||||||||||||||||||||||||||||||||||||||